Here at Imagine. Make. Believe, we have had a long and significant connection with Japan in a number of different ways, and as a result we have a couple of Japanese meals that we eat on a fairly regular basis. Gluten free temaki sushi or ‘hand rolled’ sushi is one of them, and it is one of the children’s all time favourite meals.
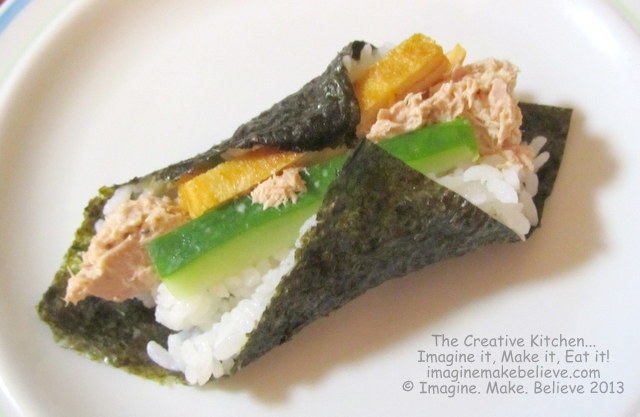
Temaki Sushi
These yummy gluten free and dairy free sushi rolls are versatile and make a fun family dinner. Once all the ingredients are prepared, it’s just a matter of taking them to the table where everyone helps themselves and makes their very own temaki sushi. Make sure everyone has clean washed hands.
We have listed the ingredients we generally use, although you could use chicken and teriyaki sauce (check the sauce is gluten free), seafood, or other vegetables like carrot. We tend to use western ingredients rather than traditional Japanese ones, but we love it! If you like hot and spicy things, you may like to have your temaki sushi with a small amount of wasabi (Japanese horseradish paste).
Ingredients
- Tinned tuna
- Thin slices of ham (make sure it is gluten free)
- Lettuce
- Cucumber
- Snow peas – remove ends
- Avocado halved and peeled
- Cheese (don’t use if dairy free)
- Eggs
- Dashi – Japanese ingredient – if you have it (make sure it is gluten free)
- Mirin – Japanese ingredient – if you have it (make sure it is gluten free)
- Mayonnaise (make sure it is gluten free) – we use S & W whole egg mayonnaise because it is gluten free and dairy free, and tastes similar to Japanese mayonnaise, which has a mild flavour
- Medium grain rice (use a similar quantity, or a little more than you would normally use for a main meal)
- Sushi seasoning liquid (make sure it is gluten free)
- Nori (seaweed sheets) cut into quarters (make sure it is gluten free)
- Gluten free soy sauce
- Dairy free margarine (check it is gluten free)
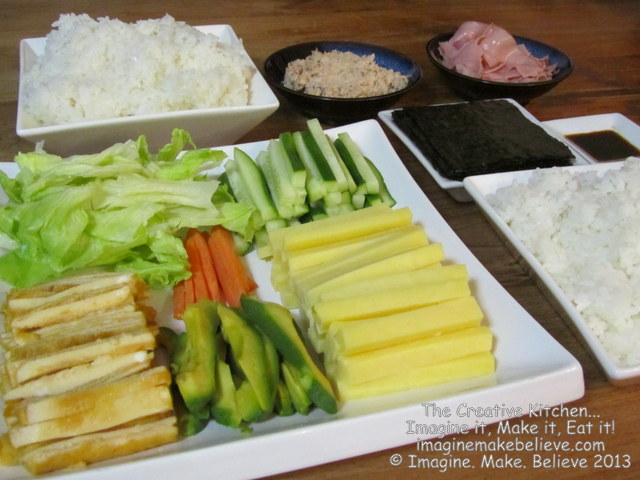
Temaki Sushi Ingredients
Instructions
Rinse the rice to remove excess starch. Cook rice in a rice cooker or the method you usually use. Once the rice is cooked, let the rice stand for 10 – 15 minutes with the lid on. Take the lid off and sprinkle the sushi seasoning (usually the label on the bottle tells you how much to use for each cup of rice) over the rice, and mix through with a wet (so the rice doesn’t stick to your spoon) large spoon using a chopping action. The aim now is to cool the sushi rice down as quickly as possible, which will help to give the rice a glossy and very sticky finish. The Japanese usually fan the rice so that the excess moisture and heat evaporates quickly. We usually fan it (wave a lid over it) for a short time to help cool it down, put the container (bowl) of rice on a surface that does not hold its heat, and stir (chop and fold) it occasionally to release the heat.
While the rice is cooking and cooling, prepare the other ingredients.
Make a rolled egg omelette (called tamagoyaki) by lightly beating 4 eggs, 2 tsp water, 1/4 tsp soy sauce (and 1/4 tsp of the Japanese ingredients dashi and mirin if you have them – these are not vital). Heat a fry pan to medium heat, add a small quantity of dairy free margarine and remove the excess with a paper towel. Pour a thin layer of egg mixture into a frypan, and when almost cooked through, roll up the egg layer, from one side of the pan to the other. Once cooked, remove from pan, or make the roll thicker by pouring another layer of mixture into the pan, cooking it until almost done, and then rolling the new layer over the first roll. Once cooked, remove from pan and repeat with remaining egg mixture.
Drain tuna and squeeze out as much liquid as possible and break up the tuna into fine pieces into a small bowl. Add a spoonful or two of mayonnaise into the tuna, mixing it through so that it becomes a thick paste. Refrigerate until ready to use and use a spoon to serve it.
Chop cucumber, snow peas, cheese, rolled egg omelette, and avocado into sticks 6 or 7 cm long x 7 mm in diameter (about the size of your little finger).
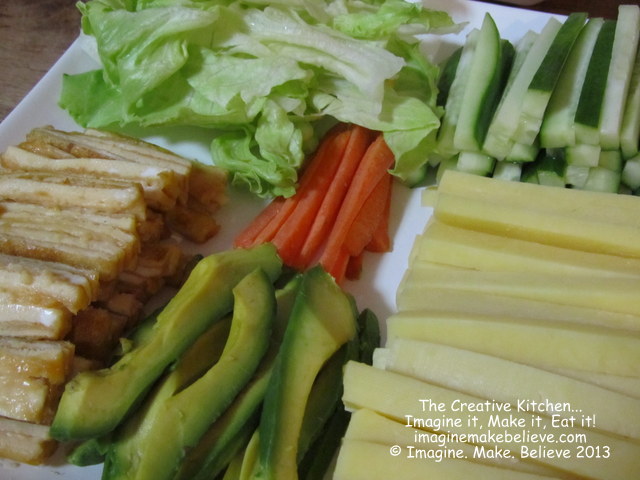
Chopped Ingredients – egg, avocado, cheese, cucumber, carrot, lettuce
Tear lettuce and ham into pieces so that they suit the size of the other vegetables.
Arrange all the chopped food on serving plates and place in the centre of the table.
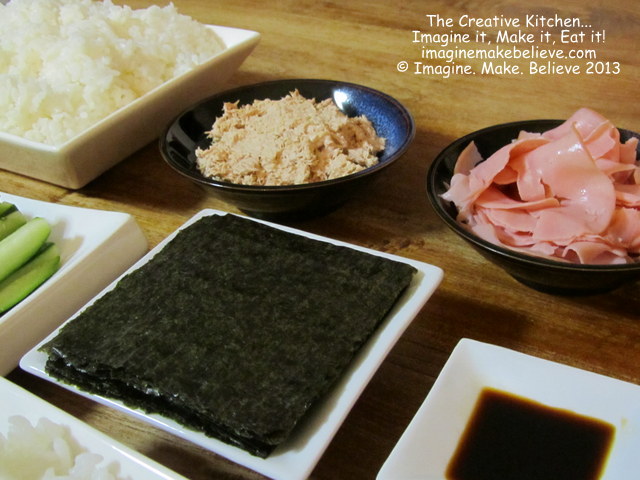
Nori, ham, tuna and mayonnaise, soy sauce and rice
To make the temaki sushi, take one piece of seaweed and put it into the palm of your hand or onto a plate. Spoon a small quantity of rice onto the nori (seaweed) – you only need one layer of rice, just enough to cover most of the nori.
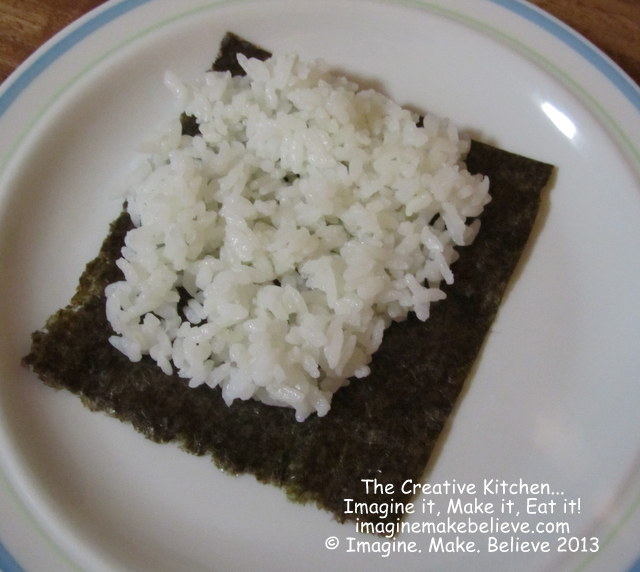
Nori and Rice
Place your choice of ingredients onto the rice – we usually have three things – one yellow ingredient, one green ingredient, and one type of meat. Don’t over fill it!
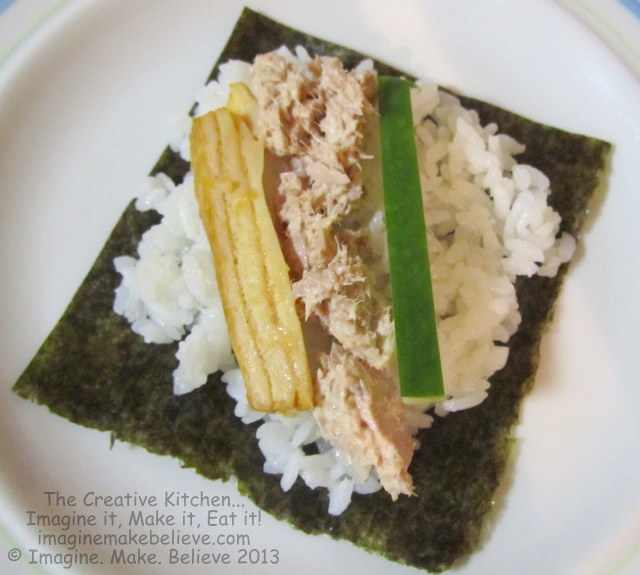
Making Temaki Sushi – Rolled egg omelette, tuna & mayonnaise mixture and cucumber, Janelle’s favourite combination!
Roll the seaweed into a cone or roll shape (we usually find the roll the easiest, but traditionally, temaki sushi is a cone shape).

Finished Gluten Free Temaki Sushi
Pour a little gluten free soy sauce onto a plate or into a tiny bowl. Dip the temaki sushi into the soy sauce and enjoy!
You’ll probably need serviettes for this one!
If there are any leftovers (we usually make extra) we make sushi rolls for school lunches. The children are usually the envy of their friends as they all want some too!


